My family is originally from Grand Portage, Minnesota. In the search for my Mother's Grandmother, I came across this collection of paintings by Eastman Johnson, painted in Grand Portage around 1856. He was most famous for his rendition of "Hiawatha", a painting he painted with the use of Grand Portage regalia created for this purpose by local women.
I then asked for and was given access to study the dress featured in the famous "Hiawatha" painting.
The following is how I actually constructed the garment completely by hand.
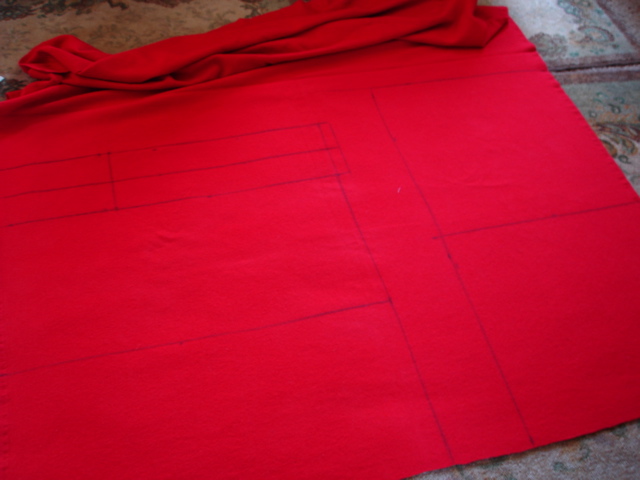
First I laid out all pieces on the wool I had purchased for this project. Surprisingly, when laid out, there was only a small square scrap left over....
The garment itself was a simple 34" wide rectangle seamed on the right side and folded over at the top about 8 inches, the length runs from selvage to selvage, if this garment was made of stroud wool there would be a white band at fold over and hem selvages.
A Ribbon accent and stabilizer was added at the neckline and a seam sewn across the front from armpit to armpit one inch below the fold over edge.
I then stitched ribbon around the edges of the back placard and shoulder straps.
The placard is centered on the back overlapping the fold, (and therefore securing it in place), The fold in the back overlaps about 4 inches, in the front it overlaps 8 inches. I then attached the straps to the back placard....
This shows the proper placement of the straps
Then I attached the straps to the front, which I had already ribboned and decorated prior to this. There is also a seam made from armpit to armpit about one inch down from fold over continuing through the ribboned neckline area before the straps are sewn down, the straps extend 7 inches past the fold over.
This also shows an additional ribboned strip on the back fold over under the placard for additional stability that is hidden by the placard when sewn.

I then cut out and layer ribboned the sleeves...and the strap that goes across the chest and joins the sleeves in the front.
Ribbon edging on sleeve, folding to the inside 1/4 inch.
The sleeves are then temporarily attached at back and the cuffs joined by rolling around the wrist and while wearing, then stitching down in place to a tapered fit that allows easy removal while wearing.
The front strap is also applied while wearing so it rides across the collar bones.
Sleeves laid out for proper matching...
The sleeves are then joined in the back by various means, sometimes just tacked at the top or joined by ribbon closure. or simply seamed together for a jacket look.
Expect to heavily bead the jacket cuffs and edges so it gains weight and hangs properly.
Bead work begins on leggings...an ongoing process....
Here the dress is assembled and hanging...a two inch ribbon added at hemline. Later I added a white ribbon to the selvage lines to imitate stroud.

My Sister and I in Grand Portage at the dock we grew up on, wearing my finished dress, well almost finished, I have done a great deal more bead work and added trade silver on this dress since then and one of these days I will take some pictures....I am also wearing a finger woven sash, garters and pouch made by Irene Rogers, world renowned finger weaving expert and teacher.

Here I am dancing with a Mic Mac Friend in Florida, note the sleeves and straps are fully beaded now....and how the front sleeve strap rides across the collar bones, extends over the shoulder and attaches to the sleeve.

Here is the original dress I made from blanket wool...I am holding my 1 1/2 point match coat and standing with my husband and fellow historian, Doyle
My Sister and I at the Grand Portage Monument and I in my blanket wool dress, perfect for a chilly day!