 |
| Two bodice pieces and 4 welts |
The post on this is here.
You have left the top 10 inches of the sides of the dress open for arm openings.
Turning the dress right side out now you will cut two rectangular bodice pieces 22"x6" and four 12"x 2" welts that will become the support for the laced closure.
 |
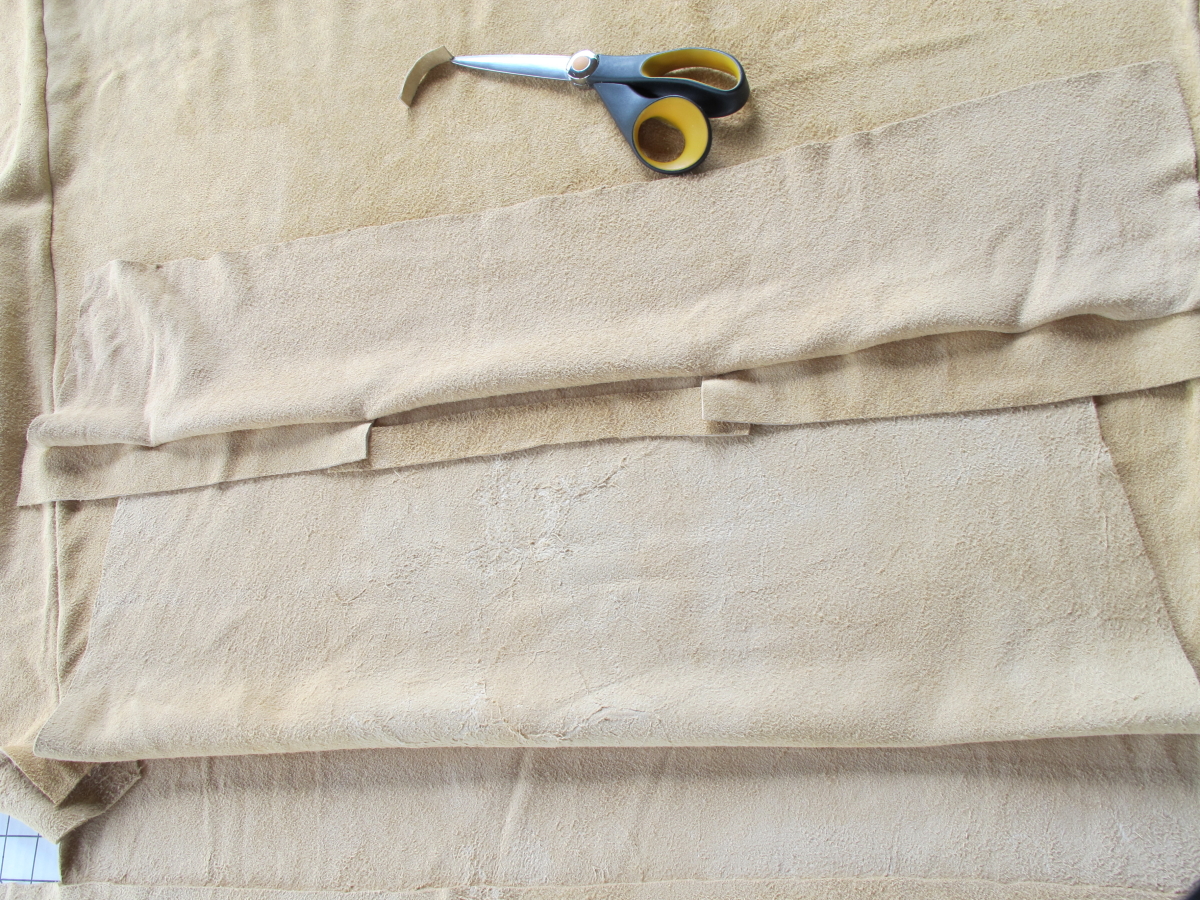
| Sewn body of dress with bodice and welts positioned |
I decided better to be safe than sorry, I could always have trimmed off the overage if it was too wide.
 |
| Another view showing the overlap on the 5" skirt |
 |
| Bodice laid over welts already in place |
 |
| Bodice folded up to reveal welts |
 |
| Here is the Shoulder welts and neck welt in place on front side of dress flipped down to show it. |
 |
| Front and Back properly pinned |
 |
| Top flipped down to show proper pinning |
The overlap is sewn into the side seams holding the flap down securely.
Now comes the part that is a bit hard to explain and even harder to show in pictures, so I have taken lots of angles to try and get my point across....
Turn the Dress Right side out.
Fold down the front dress body layer to get it out of the way for now.
VERY IMPORTANT! Here is something I added but did not get a picture of, I also cut two 1x10" Neckline Welts and placed them between the shoulder welts and the skirt body to shore up the neckline and eliminate the stretch and bulge of the original.
They are placed in the centered of the body of the dress at the neckline and then the shoulder welts placed overlapping them one inch on either side. Placing them between the welt layer and skirt body layer insures they are innermost next to the skin and held into place by the shoulder
welts. DO NOT OMIT THIS STEP, see large photo below.
Lay the 2x12" Shoulder Welts wrong side down on the wrong side, (inside) of the back of the dress, having the shoulder welts flush with the outside edge of where the bodice fold over flap edges will be and overlapping the center neck welt 1" on either side. (this is for the 28" version from here on).
Lay the bodice 6"x28" piece right side down on top of it and pin across.
Repeat for front of dress reversing order of assembly, (I know this seems complicated, but trust me, when you get to this stage you will see what goes where, just keep pinning it and flipping it over, asking yourself, "Is this right?"
 |
| Flaps lifted to show correct placement (neckline welts not shown) |
 |
| How your back flap should look measurement wise, look at the square board, you can see my museum notes too! |
 |
| Another shot of the assemblage |
 |
| Flap folded up showing a slice of the neck welt in center! Look closely! |
 |
| Success at this point is sweet...but there is so much more to go! Note knee sock belt, Classy! |
I was still wrestling with placing the neck welt reenforcement in, since it was not on the original dress, (or cut out later when the dress was altered), and eventually common sense won out and I put them in.
As an after note, it was a good idea placing the neckline welts, the neckline shows no sign of bulging or stretching, which the original did. They lend tremendous stabilization to the neckline. I'm just sorry I only got one picture of them in place, (and not a very illustrative one at that).
I decided to take a picture of the pre sewn back flap with the measurements clearly drawn out on the square board, (See large picture below). You should have an 8" centered neck opening and then 7" on either side of the 22" dress body itself.
Underneath the 10 inch neck flap overlaps one inch on either side of the 8" mark.
The rest of the bodice flap is either ends at this 22" mark, or if you made the flap wider, (as I did), the flaps and welts expend out o the picture but are welted flush to the ends of the flap too, regardless of how wide they are.
note: This handy square board is sold at Joannes for $7.00 and worth it's weight in gold, they are 3'x72" and I can cut them to pieces, draw on them, throw it out and get another instead of buying an $80.00 quilters square board that isn't as big, harder to fold up and stash and will get ruined in no time anyway the way I run through projects!).
Now, whip stitch through all layers on first the front and then the back.
Stitch temporary lacing joining the front and back shoulder welts leaving about a half inch gap filled with your lacing, (you will redo the lacing afterwards, or just leave it as I did, it looked so good!).
Throw the dress on the form and take a look at a 500+ year old dress design come back to life!
Another Important Note:
The original dress had the deer tail sewn as an actual part of the front and back fold over flap, 5" wide and welt sewn onto the 22" wide front and back fold over flap at the edge of the 22" width. (see Photo above showing my notebook, you can see the tail is actually part of the fold over flap itself).
Since I decided to make my shoulder fold over flaps 28" wide the deer tail would have been over the shoulder and down the arm at a weird angle. I decided that for my dress I would make a deer tail and sew on later at a more favorable spot.
No comments:
Post a Comment