Showing posts with label Documenting the Two Hide Strap Dress. Show all posts

Square Notch Fringe On The Two Hide Strap Dress

If you look closely you can see the shoulder lacing in Artificial Sinew
Adding a tape measure eases cutting concerns
Cutting Fringe on your Two Hide Strap Dress is one of the most rewarding and scary things you can do.

Rewarding because it finally starts to look like a Native dress, Scary because you cant undo a mistake once you cut.

It helps if you keep a few things in mind:

Square notches are made by cutting ever other fringe off
Larger Patterns at the Bottom, smaller patterns on top, I made my square notch (Roman) fringe 1/2 at the top and 1 inch at the bottom, but then repeated the 1/2 inch pattern at the hem to bring it all together.

Design should be individual and well thought out. I wouldn't copy the museum dress design exactly because it is not my dress.

Design is an individual thing.

The original dress had elements of a pinked edge as well as small fringing on the fold over flap. I decided to go with Square notch all around.

1/2" and 1" Square Notch Fringe Cut
I taped my edges with masking tape, (remind yourself to get it off quickly, leaving it on overnight will result in a pounding headache trying to get it off).

I also rounded of the corners of my flaps to eliminate the squared edges, (remember, I made my fold over flaps 28" insted of 22" so I had quite a bit of edge hangover, which suits me fine).

Detail of Large Square Notch, fringe is straight across, skirt is folded funny
Square notch fringe is made by cutting wide fringe and then cutting out every other fringe. It only looks good if you grasp the fringe you are going to cut firmly and pull it taught before nipping it off at the base with a smooth curved movement.

Practice on scraps first!

After fringing you need to place 6 laced fringes into the fold over flap every 4" going all the way through the body of the dress to secure the flap, start your measurement at the center of the flap, 2" then fringe, 4" then fringe, 4inches then Fringe, 4" then fringe.

Repeat for the back.

Try your dress on and have some fun in it, there is still so very much more to do, laced fringe on the bottom and adding the deer tail, (if you didn't make it in the flap to begin with). Then you have to fringe the side seam welts in your choice of design or trim them flush altogether, (your choice).

Six Laced fringes are placed 4" apart across breast, holding flap down
28" flap was a good idea, covers those upper arms!


Looks great from the back too!


Lovely!

This project is starting to look like something and is very comfortable too!

Cutting the Top of The Two Hide Strap Dress

Two bodice pieces and 4 welts
By now you have sewn the side seams using the welted whip stitch used in all other pre contact hide dresses.

The post on this is here.

You have left the top 10 inches of the sides of the dress open for arm openings.

Turning the dress right side out now you will cut two rectangular bodice pieces 22"x6" and four 12"x 2" welts that will become the support for the laced closure.

Sewn body of dress with bodice and welts positioned
Note: I have football players shoulders so I cut my bodice pieces 28" long to be sure the bodice capped my shoulders completely. This departs from the original, but the intended wearer probably was blessed with petite bird like shoulders, as is not the case with me.

I decided better to be safe than sorry, I could always have trimmed off the overage if it was too wide.


Another view showing the overlap on the 5" skirt

Bodice laid over welts already in place

Bodice folded up to reveal welts

Here is the Shoulder welts and neck welt in place on front side of dress flipped down to show it.
Front and Back properly pinned

Top flipped down to show proper pinning
This picture clearly shows the 5" overlap of the dress skirt, as said before, my hides were too short to make the required 46" so I had to add an additional length of leather to complete the length.

The overlap is sewn into the side seams holding the flap down securely.


Now comes the part that is a bit hard to explain and even harder to show in pictures, so I have taken lots of angles to try and get my point across....

Turn the Dress Right side out.

Fold down the front dress body layer to get it out of the way for now.

VERY IMPORTANT! Here is something I added but did not get a picture of, I also cut two 1x10" Neckline Welts and placed them between the shoulder welts and the skirt body to shore up the neckline and eliminate the stretch and bulge of the original. 

They are placed in the centered of the body of the dress at the neckline and then the shoulder welts placed overlapping them one inch on either side. Placing them between the welt layer and skirt body layer insures they are innermost next to the skin and held into place by the shoulder 
welts. DO NOT OMIT THIS STEP,  see large photo below.


Lay the 2x12" Shoulder Welts wrong side down on the wrong side, (inside) of the back of the dress, having the shoulder welts flush with the outside edge of where the bodice fold over flap edges will be and overlapping the center neck welt 1" on either side. (this is for the 28" version from here on).

Lay the bodice 6"x28" piece right side down on top of it and pin across.

Repeat for front of dress reversing order of assembly, (I know this seems complicated, but trust me, when you get to this stage you will see what goes where, just keep pinning it and flipping it over, asking yourself, "Is this right?"


Flaps lifted to show correct placement (neckline welts not shown)


Here are a couple of shots to show how it should look at this point. (You can see the shoulder and neck welts, they are sandwiched in between).
How your back flap should look measurement wise, look at the square board, you can see my museum notes too!

Another shot of the assemblage


Flap folded up showing a slice of the neck welt in center! Look closely!

Success at this point is sweet...but there is so much more to go! Note knee sock belt, Classy!
Here I have flipped up the front fold over flaps on both front and back, this is what you should see, with the addition of the two neck welts placed under the shoulder welts and centered on the neck with a one inch overlap of the neck welts that I did not add until after this picture...sorry!

I was still wrestling with placing the neck welt reenforcement in, since it was not on the original dress, (or cut out later when the dress was altered), and eventually common sense won out and I put them in.

As an after note, it was a good idea placing the neckline welts, the neckline shows no sign of bulging or stretching, which the original did. They lend tremendous stabilization to the neckline. I'm just sorry I only got one picture of them in place, (and not a very illustrative one at that).


I decided to take a picture of the pre sewn back flap with the measurements clearly drawn out on the square board, (See large picture below). You should have an 8" centered neck opening and then 7" on either side of the 22" dress body itself.

Underneath the 10 inch neck flap overlaps one inch on either side of the 8" mark.

The rest of the bodice flap is either ends at this 22" mark, or if you made the flap wider, (as I did), the flaps and welts expend out o the picture but are welted flush to the ends of the flap too, regardless of how wide they are.

note: This handy square board is sold at Joannes for $7.00 and worth it's weight in gold, they are 3'x72" and I can cut them to pieces, draw on them, throw it out and get another instead of buying an $80.00 quilters square board that isn't as big, harder to fold up and stash and will get ruined in no time anyway the way I run through projects!).

Now, whip stitch through all layers on first the front and then the back.

Stitch temporary lacing joining the front and back shoulder welts leaving about a half inch gap filled with your lacing, (you will redo the lacing afterwards, or just leave it as I did, it looked so good!).

Throw the dress on the form and take a look at a 500+ year old dress design come back to life!

Another Important Note:
The original dress had the deer tail sewn as an actual part of the front and back fold over flap, 5" wide and welt sewn onto the 22" wide front and back fold over flap at the edge of the 22" width. (see Photo above showing my notebook, you can see the tail is actually part of the fold over flap itself).

Since I decided to make my shoulder fold over flaps 28" wide the deer tail would have been over the shoulder and down the arm at a weird angle. I decided that for my dress I would make a deer tail and sew on later at a more favorable spot.

Two Hide Strap Dress Top Delemma Resolved

Left Shoulder Laced tightly with Boot lacing
When I first started researching this dress long ago, I could tell something was amiss with the top of the dress when I received the photo on the right from the museum.

Tradition says the sleeves were always worn on the outside of the dress so they could be removed as the day warmed up and tasks for which bare arms were called for arose.

Right shoulder showing original Lacing holes
If the outfit was worn as displayed, you would first have to remove the entire dress before removing the sleeves. Also, the sleeves were highly decorated which would be senselessly  hidden by placing them under the bodice.

This did not hold with oral tradition. Many early authors observed that the sleeves were easily shrugged off when hard or dirty work was at hand that would damage or soil them. The way the dress was displayed in this photo by the museum did not agree with this oft repeated testimony.

Yoke showing the later notched out neckline
 When I finally examined the dress myself in person I could spot the problem of why the sleeves were placed on the inside of the dress right off.

The lacing was threaded and snugged up through the thickest part of the fold over creating a stiff lumpy mass of leather that the fitted sleeves would not cover without some discomfiture.

I could also see that it was not the original intended design because of the ill placed leather strap thongs where lacing once existed on the right shoulder. Originally he top of the dress was joined by lacing both sides of the shoulder as was evidenced by the holes left from the lacing in the welted flap.

In order to wear the dress properly, one would have originally laced at least a two inch gap between front and back piece. The the yoke of the dress would fall lower on the breast and not bunch at the shoulder and neckline. If worn as shown, the neck of the dress would literally saw you off at the neck line and the bulk of the two welted seams jutting off the shoulder would make wearing the sleeves on the outside impossible. Something had been done to seriously alter the original design of the dress.
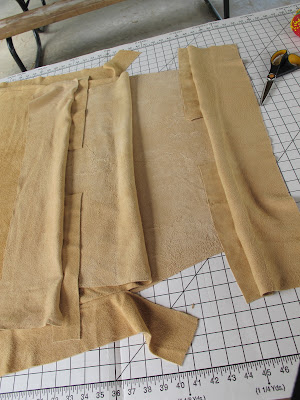
Two inch shoulder welts in place, narrow welt at neckline
An alteration was made by taking the lacing off one shoulder and replacing it with two leather straps, tightening up the lacing on the other side so it did not cut the shoulder and then cutting out the neck larger by cutting down one inch through the fold over seam and then across to the other side of the neck, then stitching the two newly created raw neck edges together with running stitch and pinking the edge on both front and back.

This was a poor solution at best, the neck cut out was not deep enough to be effective and the resulting weakness of not having the re enforcement of the continuous welted seam joining the dress and flap caused the neck edge to bulge out and still cause irritation, (sweat stains in the adam's apple area tell the whole story of how this neck edge still abraded the throat, as well as an afterthought dart was cut and sewn perpendicular in the center of the neck hole in the front under the flap to try to reduce the resultant bulging).

I can't fault the original seamstress for this problem, she was obviously an expert and very meticulous in every detail of the garment and accessories, how this neck design problem came to be was probably a result of the person who later wore it and realized it wasn't comfortable enough for them, (especially when they used boot lacing to replace the original soft brain tan lacing), and then took it upon themselves to redesigned it. The original seamstress would have taken the garment apart and remade it correctly, rather than cut out the seam that re enforces the entire top of the dress yoke.

The decision that the remake was amateur was further enforced when I realized the lacing was at some time replaced with commercial boot lacing and not the soft brain tan lacing that would have been used in the first place.

I came to this conclusion after months of deliberation, (This being the sole reason for my not charging right into this project), I finally put myself in the shoes of the originator and realized that as talented as she was, she would never had made this amateur correction, she would have simply opened up the welt seam, add a wider welt and use it for the structure on which the lacing wends. That way the lacing would span perhaps half an inch and the integral structure of the garment would remain in place and at the same time making it more comfortable for the wearer, yet retaining the lacing design of the original.

It was difficult for me to make this decision, after all, I was departing from the original design. But when design weakness so obviously shows itself, one can't in good conscience repeat the purposely and ignorantly created flaw.

I know the creator would have corrected it herself had she been given the opportunity to do so. Perhaps the dress was gifted, or passed on to a younger relative who through time made the horrific adjustments of adding leather boot lace and adding leather thongs through innocent ignorance.

The garment shows the dress was well worn, perhaps by two or three generations in succession and the needed talents of sewing were found wanting in later generations. We will probably never know the real story and I can't entirely fault their ignorance because at least they had the wherewithal to passed the garment on so that today I stand am able dumbfounded before it. I am eternally grateful to them for keeping it safe in any form for me to study and try to humbly reproduce.

The thought of extending the welts to two inches on both the front and the back flap on which to tie the lacing does a couple of good things for this dress.

First, the lacing gap is only a half inch wide and so does not dig into the shoulder and negates any future digging in or sagging, (or replacement with boot lacing).

Second, the bulk of the welted seam drops lower across the front of the breast, allowing the sleeved coat to ride naturally on the shoulders and not get lumped up on the thickness of the triple leather seam.

Third, the welt is a single layer that drapes across and down over the tip of the shoulder smoothly,  creating a soft capping, whereas the triple bulk of the fold over jutted angrily off the point of the shoulder a poked out at an alarming angle making the sleeves impossible to wear on the outside of the garment. (This explains why the museum placed the sleeves improperly on the inside of the dress instead of outside where they would normally be).

Taking liberties with design is not something that I do lightly, it took me months to allow myself to go forward with my decision to change an obviously flawed part of an almost perfect garment.

Now that I have done this, I take all blame and any complaints that I have somehow made this garment less faithful to the original, but I know in my heart that now that I have done it, the original seamstress is smiling down on me from somewhere that I did my best to remake the dress in her image of beauty and serviceability. And the sleeves now fit smoothly over the dress where they belong.


Cutting Hide on the Body of the Two Hide Pre Contact Strap Dress

Cutting Hide outside is always a good idea!
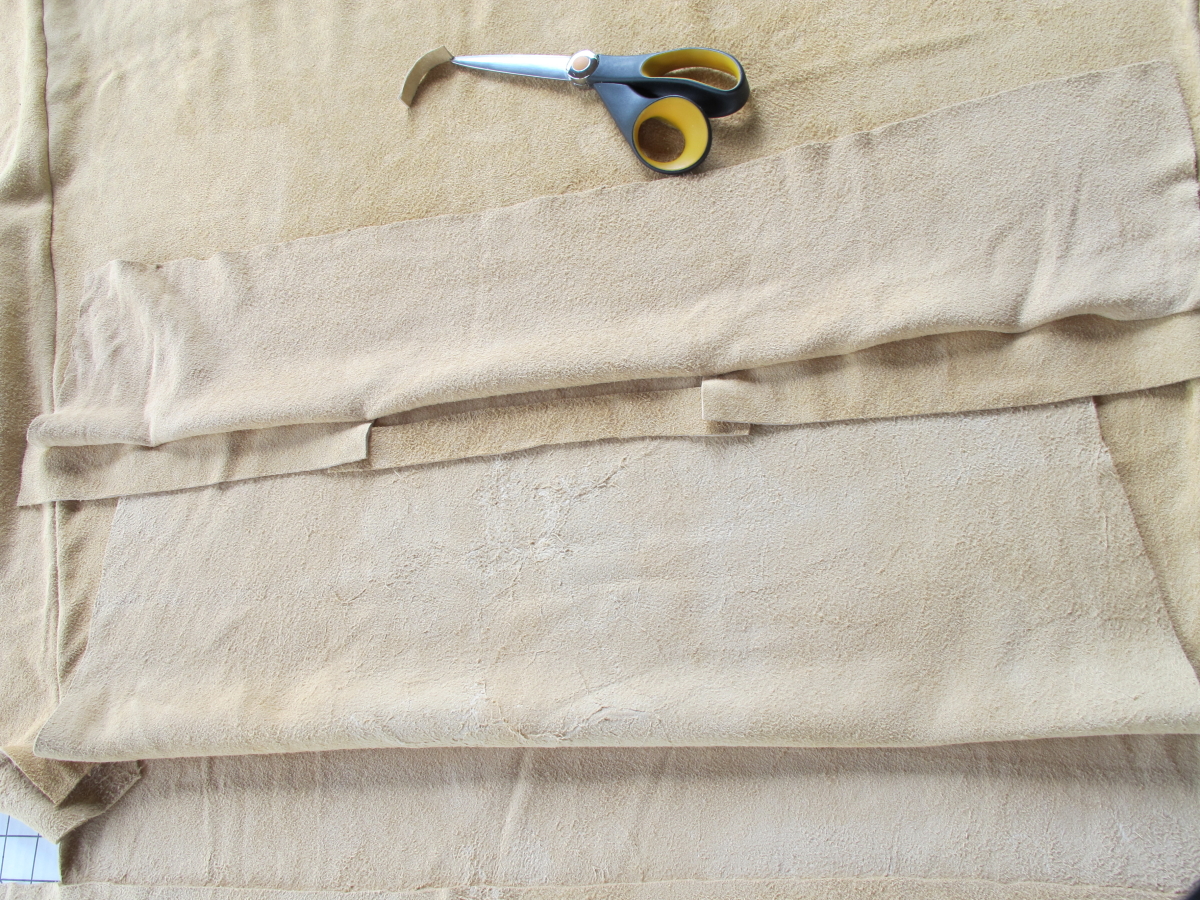
Cut two pieces of hide for the front and back skirt

46" Long
22" Wide at the top
38" Wide at the bottom

Note: I had to cut out a 22"x36" skirt top and then add a 15" long piece at the bottom, overlapping 5", as my hides were too short to get the full length, (this was commonly done). The 5" overlap will be used to create a scalloped edge later.

Cut two 3" x45" Welts

Cut two 28" wedge shaped placards, 5" wide at the bottom and 1" wide at the top.

45" welt and Wedge Placard in place aligned with hem
Welt and placard pinned to back edge of skirt
Cut two additional welts 29 inches long and 5" wide at the bottom and 1" wide at the top.
Wedge Placard Folded

Wedge welt placed on top wrong side down
 Place the hides right sides together, trim any obvious edges until the two hides match up perfectly, if the sides don't line up and aren't straight, you will have bulges and puckers along the edges.


Fold back the top hide to reveal the side edges and place your long welt on the hide right side to back right side aligning with the hem.

Place you wedge Placard on top of the welt right side to back right side and align with hem trimming all pieces so the match up straight and even.


So the order would be Bottom skirt piece right side up, then long welt right side down, then wedge placard right side down.


Pin both wedge placard and welt to the back of the skirt to the top of wedge placard, placing your pins about 1/2" in and running parallel to the edge.


Be sure your edges are straight and even

This is how the wedge placard should look when pinned properly

Wedge placard apex where everything comes together


Fold the Placard Wedge over so the edges line up the length of the wedge.


Place the 29" tapered wedge welt wrong side down over the folded wedge aligning the edges, trimming all edges to match.


Fold the Top Dress skirt piece over all layers and pin wedge placard, wedge welt and skirt top together from hem to within 10" of top of skirt 1/2" inch from edge and pins running parallel to edge.

Trim all pieces to be flush and straight to each other.

Repeat procedure for the other side of dress skirt.


Notes:
I cut the hides for the skirt dress neck of the elk side up so I could take advantage of the gradual wide tapering width of the natural hide.

This gave me the advantage of the hides being thinner at the top which would be desirable since you want the weight of the heaviest part of the hide at the bottom to pull the dress straight and the lighter part above since it will be cinched at the waist, having less bulk by doing so.


This would differ from the tradition of hanging all hides neck down, but I have noted exceptions to this rule when it came to multiple piece skirts such as this one, hides were placed and cut according to what ever shape and thickness best suited the design and made best use of the materials at hand.

Recreating A Two Hide Pre Contact Ojibwe/Cree Strap Dress

Two Hide Strap Dress
On Display
Dress Body
I am so excited to be finally recreating the Ojibwe/Cree Strap Dress I examined at the Chicago Field History Museum.

This dress has never been seen in any pictures in full color, so for the first time any where, feast your eyes on the beautiful Vermillion Red painted Dress, Sleeves, Hood and Leggings!

The painting was done by using just the fingers as a brush, so you can actually see the fingerprints of the creator in the paint.


Leggings
 Words cannot describe how grateful I am to The Staff at the Museum for giving me full access to this garment, I was able to measure and photograph every detail to be able to bring you this step by step recreation that will take place over the next couple of months.

I also made a video about documenting the details of construction and will be releasing that at a later date.

This dress was collected in Canada in the 1890's and has been cataloged as being both Ojibway and Cree.

It has elements of both cultures so I don't think we will ever really know its exact history, but with my examination, we can recreate this wonderful pre contact garment!

I will be fist recreating this garment in Vegetable Tan Elk Hide and then in Brain Tan, once I work out the kinks in the pattern.

Sleeves
Labeling this as a Strap Dress also takes some liberties with the term, since it is actually tied on one side with thongs and laced on the other shoulder.

This does not make it a true Strap Dress per se as the sides are cut out for the arms at the side seams, where most Modern Strap Dresses are suspended low enough on the breast to not make the armpit cuts necessary.

Hood
There are some mystery adjustments to this garment also that gives one pause to think, originally both sides were laced at the shoulder, this was modified by replacing one laced side with thong straps soon after creation, as the leather for the thongs is sewn into the welted seams and matches the original leather perfectly.

Another mystery is the placement of two tails at the breast line, (one on the front and one on the back), normally one would place one tail on the front at the right shoulder to pay homage to the original one hide wrap around dress that predicated this garment.

Stay tuned as I show more photographs and show step by step how this wonderful garment was created!


Could I be any happier?


Chicago Field History Museum, Here I Come!


October 3, I will be at the Chicago Field History Museum to finally get a look at the dress I have been studying for the last thirteen years.

This is a moment of giddiness and a solemn moment of thanks for the opportunity to finally answer some questions about a truly Pre Contact Garment.

I remember well my old website over fifteen years ago, when I put a shout out to anyone who might have information regarding any kind of Strap Dress made from Deer Hides.

At the time, I had just finished examining a Stroud Wool Strap Dress at the Dept Museum in Duluth Minnesota and was at the time, in doubt as to whether a hide strap dress had ever been worn, (thinking that the wool lent itself to this particular design and did not translate into hide). This was in 1998.

Thanks to a Woman who I have lost contact with over the years named Donna, she took the time to crawl up in her attic and sort through her old collection of "Whispering Winds" magazines to find an article written in Spring/Summer 1984 about a strap dress reportedly at The Chicago Field History Museum.

I then began a long series of letters and emails with the museum about this dress, since I had no real picture or description other than it was an Ojibway two hide dress.

I lucked out when Donna sent me a physical copy of the picture and there was a negative number at the bottom corner. The reason they couldn't find this particular dress was because it was filed under "Creek" instead of Ojibway or Chippewa. Once I had the proper number, they graciously sent me the photos you see here.


Immediately it raised more questions than answers, the model shows the sleeves being worn under the dress and the yoke being pulled up over the shoulders. This was not how my documentation said it should be worn, but it could be a variant of the strap dress, or maybe, since the straps are obviously not part of the collection, the dress was simply displayed the best they could at the time given what they did have at their disposal. Only a personal visual inspection could answer these questions.

I was very busy in my personal life at this time and a trip to Chicago was pretty much out of the question at that time, I had many things to sort out about my life and most of my time was spent making the wool strap dress I did have documentation on.

Finally a couple years ago, I reopened the dialogue with the museum about the dress, but there was never a time to view the dress that fit my time schedule.

This time when they invited me to come and see the dress myself, I decided that it was now or never and I filled out the proper paperwork, and now I find myself in the enviable position of actually being able to see this dress for myself and document it for all who are interested.

This has to be one of the greatest days of my life and I'm glad to share it with all of the people who told me never to give up and keep on trying.

Thank you Donna, for fighting your loathing of spiders to crawl up in your attic and retrieve your old documentation that started this all.

Thank you Sheila, for offering to back me up and always asking if I'd gotten in yet, you built a fire under me when I had almost given up.

Thank you to my Husband, Doyle, for being game to just about go anywhere at anytime to see me happy, who believed in me and never let me quit.

Thank you to the Staff at the Chicago Field History Museum for letting me have access to this precious Garment!

And Thank you to everyone else who reads this Blog and enjoys it, you have kept me going and documenting for the last year. It's so wonderful to get to an Event and be greeted by people who have been following along and enjoying what we do.

I plan on re-creating the entire garment, moccasins, leggings, hood, rabbit coat and all...so stay tuned, this is going to be a long ride!


LinkWithin

Related Posts Plugin for WordPress, Blogger...