Ojibwa and Mic Mac Hand Sewn Regalia in Elk Update
I'm getting ready to start these projects back up now that I have the room and space to do it. Please feel free to comment and share your project!

Sew Your Own DIY N95 Type Forever Safe Mask Sewing Tutorial
Sew the safest, washable, long lasting homemade mask with my
do it yourself tutorial. Based on the Florida University pattern judged
best fitting for all persons including those who wear glasses or have
facial hair. 95% virus proof when properly cared for. Long term mask for
daily wear at work or in public
Sewing Perfect Continuous Bias Tape Strips, No Sewing, Glue or Fuss
I’m sewing protective masks for Coronavirus and have seen sewers using the bias tape foot but joining the strips with sewing or glue. I show how to join your strips quickly, neatly and easily as my Mother showed me as a child with no glue, stitching or ironing before sewing using the Bias Tape Attachment. I’ll be making another video about the masks I am making so subscribe and you’ll see the next steps in making a reversible, washable reusable mask with Pelon Non Woven lining for extra safety. These masks will last months, if not years and are easily maintained.
Fabric Destash to Restash The Vintage Textiles Roll Out of Bed
Celebrate with me the moving of my fabric from my inaccesable under bed storage system to the upper cabinets in my new reorganized ewing/craft room in my RV that I live in full time.
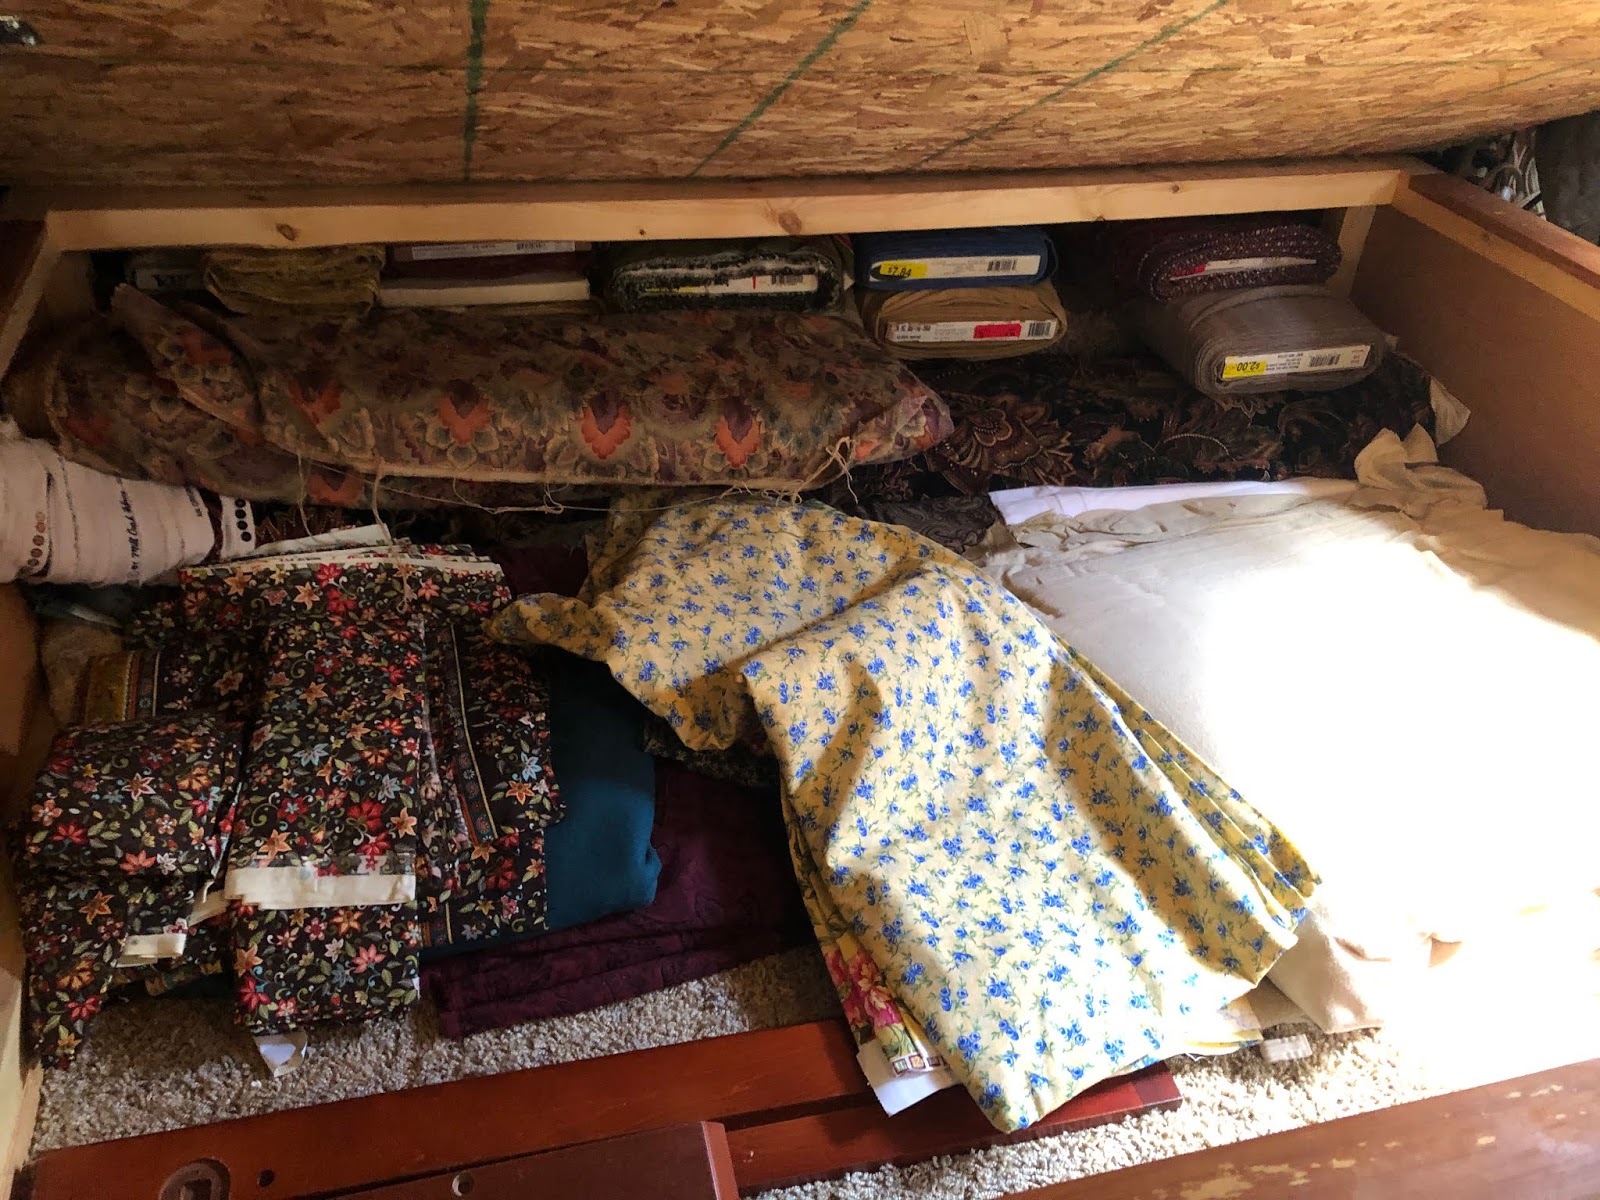 |
| Before: All my fabrics were stored in my RV under bed storage. I couldn't access them alone. |
 |
| I refolded and rebolted all my textiles stowing them in my upper cupboards in my Sewing/Craft room. |
 |
| Lovely old Vintage Cottons |
 |
| More cottons and a fabulous fabric, Unknown Content, if you know if this gossamer gold checked textile, please let me now. It is transparent. |
 |
| Matt Hamilton Woolens from his vintage ware house. They don't make this kind of wool anymore. Also some cottons. |
 |
| stashed! |
 |
| Sorted and folded |
 |
| Woolens Away! |
 |
| OK, this brings tears to my eyes. Some of you will understand. |
Rebuilding my Historic Kitchen Costumes

This half bolt of incredibly beautiful cotton India block print has been through several rebuilds and outfits, it was first a huge 5 yard Colonial skirt my Sister hand stitched up for me at Grand Portage Rendezvous in 2006.
It then was taken apart and a shirt for my husband was made from it and the rest used as a Irish working woman's weskit and 3 yard skirt.
Over time the boning in the weskit began to curl and the bottom tips flipped up every time I sat down. I also spent a lot of time tugging it down into place, since I had miscalculated the length of my waist when I made it. It also puckered between the eyelets as the boning got tired. I temporarily fixed it by adding more eyelets but I knew I had to do something to save one of my favorite outfits.
 This got me thinking that if I got out my dress form, I could attach the skirt to the weskit, which would pull the boning straight by it's weight, and bring the dress into better conformity with the actual fashion of the day.
I pinned the skirt backwards on the form and split the seam down the back, putting the weskit on over it.
I then invisibly whip stitched the weskit bias to the skirt from the outside, turn the edges of the skirt in about two inches down the split and matching the front points of the weskit with the turned back skirt edge.

After hand stitching the two together from the front, I turned the garment inside out and remounted on the form, cut off the excess fabric and whip stitched along the edge of the weskit bottom to assure a strong joining.
 Here I am in my redone outfit, with my new skirt and wonderful stays made by Pat Lund. The colonial stays are spiral metal boning and actually help me with back support as I toil through the day. This outfit is 5 years old and has seen weekly heavy duty in my kitchen. In fact, I wear it every Saturday, cooking, hauling water, pounding stakes and in general abusing it in every way known to working woman kind. This rebuild keeps it in my working wardrobe for years to come.
Vintage Kenmore C Cam Decorative Stitch Tutorial Model 158.1781
Demonstrating how to use Decorative Kenmore Vintage C Cam Stitches to add structure and beauty to your garments. My Kenmore Sewing Machine, model 158.17811 is a convertible to free arm, portable machine I bought in 1976 and have used to sew everything from leather, wool and canvas to silk. Watch for more vintage sewing tutorials from Stitching Up History soon, subscribe here, Instagram, Facebook, Twitter and Pinterest to keep up with my sewing adventures!


Summoning The Creative Muse and She is Me?
 |
| The Muse, She's usually naked. Distracting, I'd think... |
For more details from an Iban woman's perspective, check out:
"Songs of my Foremothers"The definitive, classic pua kumbu
This particular quote struck me hard in the face:
"The more powerful a design, the closer it brings an Iban to the spiritual world, and the more dangerous it is for her to create, for she is actually summoning the spirits, ancestors and beings she is portraying and weaving them into her work. As the shaman serves as mouthpiece for ancestor and guide spirits, the Iban weaver is a channel or vessel for the sacred speech she weaves, and in so doing becomes a sort of demi goddess herself."
I have been experiencing precisely this very thing, it doesn't feel as if I am communing with or assuming a Deity of any kind, it's more like being driven to do something without knowing why, as if you can hear a voice no one else can and you simply must act on the suggestion or pay a large price emotionally.
When I was recreating a 300 year old Native dress I had no idea how I was going to close the shoulder and as I was musing on it I suddenly found my hands moving and making the difficult stitching with ease, I was done before I even realized I had begun. "It begins Thus.." I clearly heard in my mind.
I remember turning to my Husband an telling him that if this was possession, I guess it is not such a bad thing.....until I had to take time down to attend other business.
Suddenly I was depressed and angry, as if not of my own accord. I felt frustrated and bewildered in trying to attend to modern things, as if I had forgotten how to function in the modern world.
I finally called a truce with the force, promising it my full attention when I could return to the tasks laid before me by this persistent Ancestor.
It's almost as if someone is living Rent Free in my heart and is petulant if I try to have my own way. I don't feel endangered at all by this habitation, in fact, I have been able to experience some remarkable moments of clarity about how this Person, (as She once was), lived and functioned in Her own time. This is well worth the price of having another voice adding it's opinion to my endeavors.
I understand her impatience, after all, I am also human and may eventually pass without getting across what this messenger brings me. She feels it is important enough to hijack my thought process and as I learn I am beginning to agree.
It's like two people from completely different worlds trying to have an important conversation without the commonality of language.
I could be completely delusional, I am, after all, a Very Rational Person, (or VRP of the Doubting Thomas Type), who doesn't know quite if I should believe what is happening to me.
It could be great hubris on my part, perhaps I want to so much I am summoning it out of my need to succeed at something original and difficult for anyone else to comprehend. Who Knows?
For now I am content to be On Board for the Great Adventure, Crazy as a Loon or not, as it intrigues me to no end to be on the receiving end of knowledge I have no rational explanation for it's existence in my mind.
Life is a strange thing.
I thank you for this article, it perhaps is the first time I have read of an explanation for what happens to me and I would like to think it is real...I have been compulsed at certain times of my life to get tattoos and designed them myself, I don't talk about them or show them, they are just for me. Makes one think....even one like myself, who does not believe in such things, and yet I do ponder on this poorly staged Great Pageantry we call Life.
I am no stranger to ordinary superstitious fear, having almost lost my spark of life several times only to regain my strength and continue on my path after beseeching any and all supposed Creators for more time to finish what I must do. I imagine we are all overblown with our own importance.
There isn't much that can frighten me now, It's pretty much all happened to me so there are few surprises lurking in my closet, other than the fear that someone I care for will be cut short on their own journey and their song left unsung. I so hate a Bad Ending.
After considering all things I am left with the knowledge that can only try to muddle about towards my addled sense of blind destiny, grasping at the invisible hands that beckon me hither and bid me look and learn.
Not a bad thing really. I could be an avid Golfer. Now That's Crazy!
I've prattled on long enough, I hope maybe I'll find someone who, like me, is more knowledgeable and can help me on my way, it is, after all, a bit strange...living this unearthly way. until then I great comfort in the idea that All Will Presently Be Revealed, (Or they will finally lock me up).
Two Hide Strap Dress Project Progress
 |
| Front side, sleeves on Fringe all cut! |
The sleeves have turned out just marvelous, They are truly a masterful design!
They provide total arm and back coverage, ( a complaint with other sleeve designs), and dont require a strap across the front to hold them in place!
I added simple cuffs to mine and have yet to decide if I will leave the edges raw or turn them, or welt seam them and line the jacket....we'll see....
The cuffs were not on the original and I had a Facebook comment saying my personal changes seemed wrong!
 |
| Back Side, note how well the sleeves drape! Eureka! 20 years of research just paid off! |
Native Women were expected to make each dress their own, in their own way. It was not, after all, a UNIFORM.
I always note my custom changes and provide information for those who do want a carbon copy.
Also, if I was making a dress for a museum, I would do it their way, not mine.
I hope you have enjoyed this project and hope to hear from you as you try and attempt your own version!
More to come when I have more time to write...need to cut some more hide and get the sleeves made for the second dress!
Shiela's Saura Two Hide One Shoulder Dress In Action at Ft Caroline
  |
| Add caption |
Her is Sheila at Fort Caroline portraying a Sauratown Native American Woman in the dress we designed for her.
It is a One Hide, One Shoulder Two hide Elk Dress of the South Eastern Variety.


Warning: Artists at Work! Old Antique Dress Form Punked Out!
 |
| My Little Corner of The World, Two Hide Dresses I Working on, Plus Shell Jewelry to match! |
 |
| Doyle Hand Carving more Conch Shell Jewelry For Our Projects! |

I was going to just strip her for parts because she is so tiny, (maybe a size 2 or 3), but she grew on me so I striped her naked, (her covering was rotting off), and am going to paint her up and use her as a jewelry model.
This is a project best done outside with a stiff breeze because she was full of dust and mildew. I started by removing the cover by tearing it off piece by piece, then scrubbing her with a fingernail brush to remove the dirt inside and out.
She is made of pressed cardboard so washing was not an option.
 Now she is sitting in the sun for a day or two to kill of the residual mold and mildew, while I try to decide how she's going to be painted!
I will probably seal her first with a little spray kilz and then spray paint her a beach themed neutral color that wont clash with the shell jewelry.
I am tempted to try some of those new stone textured paints but I'm afraid that as much as she is moved about and shoved odd places to be stored the texture would flake off.
Well, we'll see once I get to the store. We have an Ace Hardware in town so I am in Hardware heaven, I used to work at one years ago and I love all the neat things they carry for us DIY folks, plus their staff is very educated and helpful, (if I must brag so myself, Ace was my favorite pre College job!).

now I have to gather and reshoot just about every piece of jewelry I have made.
I am going down to the beach for a photo shoot, there is a great river here with a nice sandy stretch to stage things on.
If you want to see the makeover you can click on this link to read all about it!


Square Notch Fringe On The Two Hide Strap Dress
 |
| If you look closely you can see the shoulder lacing in Artificial Sinew |
 |
| Adding a tape measure eases cutting concerns |
Rewarding because it finally starts to look like a Native dress, Scary because you cant undo a mistake once you cut.
It helps if you keep a few things in mind:
 |
| Square notches are made by cutting ever other fringe off |
Design should be individual and well thought out. I wouldn't copy the museum dress design exactly because it is not my dress.
Design is an individual thing.
The original dress had elements of a pinked edge as well as small fringing on the fold over flap. I decided to go with Square notch all around.
 |
| 1/2" and 1" Square Notch Fringe Cut |
I also rounded of the corners of my flaps to eliminate the squared edges, (remember, I made my fold over flaps 28" insted of 22" so I had quite a bit of edge hangover, which suits me fine).
 |
| Detail of Large Square Notch, fringe is straight across, skirt is folded funny |
Practice on scraps first!
After fringing you need to place 6 laced fringes into the fold over flap every 4" going all the way through the body of the dress to secure the flap, start your measurement at the center of the flap, 2" then fringe, 4" then fringe, 4inches then Fringe, 4" then fringe.
Repeat for the back.
Try your dress on and have some fun in it, there is still so very much more to do, laced fringe on the bottom and adding the deer tail, (if you didn't make it in the flap to begin with). Then you have to fringe the side seam welts in your choice of design or trim them flush altogether, (your choice).
 |
| Six Laced fringes are placed 4" apart across breast, holding flap down |
 |
| 28" flap was a good idea, covers those upper arms! |
 |
| Looks great from the back too! |
 |
| Lovely! |
 |
| This project is starting to look like something and is very comfortable too! |
Cutting the Top of The Two Hide Strap Dress
 |
| Two bodice pieces and 4 welts |
The post on this is here.
You have left the top 10 inches of the sides of the dress open for arm openings.
Turning the dress right side out now you will cut two rectangular bodice pieces 22"x6" and four 12"x 2" welts that will become the support for the laced closure.
 |
| Sewn body of dress with bodice and welts positioned |
I decided better to be safe than sorry, I could always have trimmed off the overage if it was too wide.
 |
| Another view showing the overlap on the 5" skirt |
 |
| Bodice laid over welts already in place |
 |
| Bodice folded up to reveal welts |
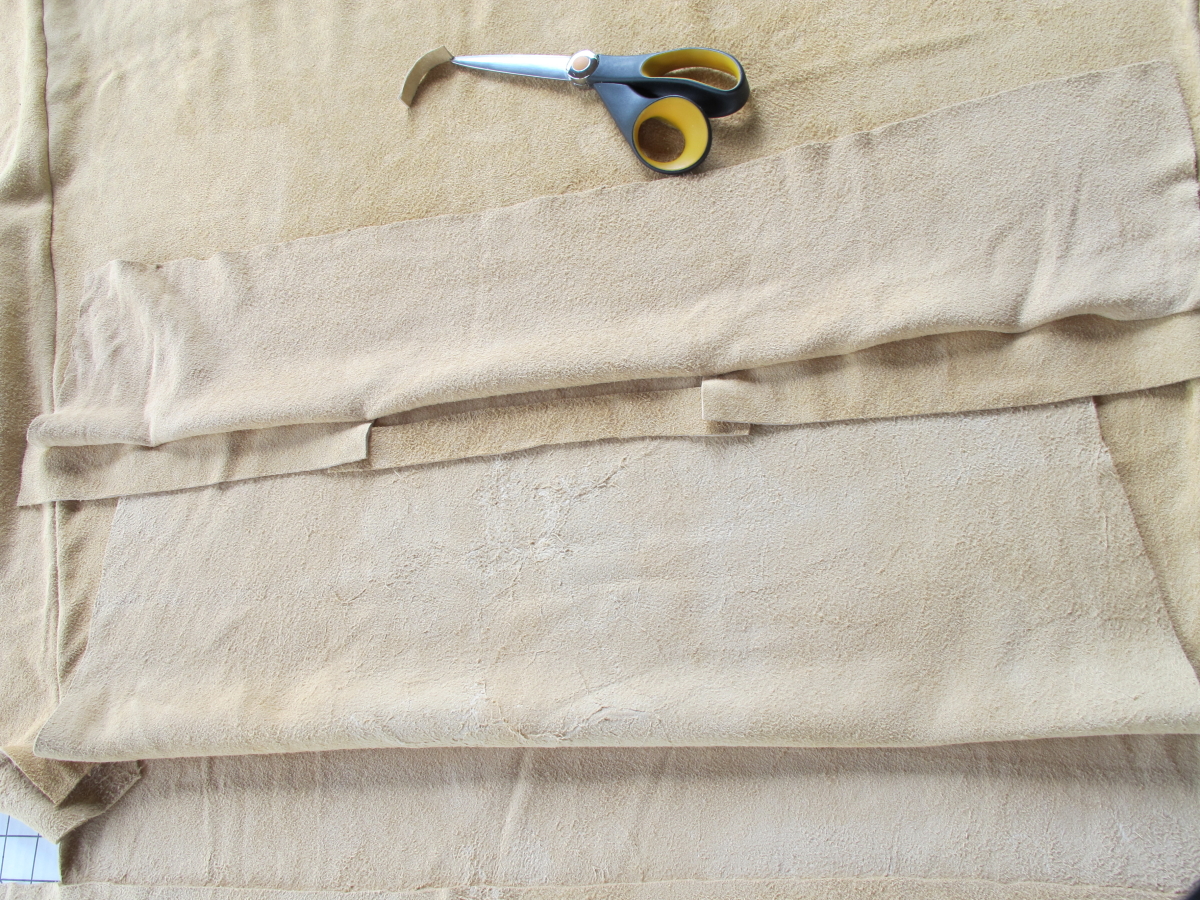 |
| Here is the Shoulder welts and neck welt in place on front side of dress flipped down to show it. |
 |
| Front and Back properly pinned |
 |
| Top flipped down to show proper pinning |
The overlap is sewn into the side seams holding the flap down securely.
Now comes the part that is a bit hard to explain and even harder to show in pictures, so I have taken lots of angles to try and get my point across....
Turn the Dress Right side out.
Fold down the front dress body layer to get it out of the way for now.
VERY IMPORTANT! Here is something I added but did not get a picture of, I also cut two 1x10" Neckline Welts and placed them between the shoulder welts and the skirt body to shore up the neckline and eliminate the stretch and bulge of the original.
They are placed in the centered of the body of the dress at the neckline and then the shoulder welts placed overlapping them one inch on either side. Placing them between the welt layer and skirt body layer insures they are innermost next to the skin and held into place by the shoulder
welts. DO NOT OMIT THIS STEP, see large photo below.
Lay the 2x12" Shoulder Welts wrong side down on the wrong side, (inside) of the back of the dress, having the shoulder welts flush with the outside edge of where the bodice fold over flap edges will be and overlapping the center neck welt 1" on either side. (this is for the 28" version from here on).
Lay the bodice 6"x28" piece right side down on top of it and pin across.
Repeat for front of dress reversing order of assembly, (I know this seems complicated, but trust me, when you get to this stage you will see what goes where, just keep pinning it and flipping it over, asking yourself, "Is this right?"
 |
| Flaps lifted to show correct placement (neckline welts not shown) |
 |
| How your back flap should look measurement wise, look at the square board, you can see my museum notes too! |
 |
| Another shot of the assemblage |
 |
| Flap folded up showing a slice of the neck welt in center! Look closely! |
 |
| Success at this point is sweet...but there is so much more to go! Note knee sock belt, Classy! |
I was still wrestling with placing the neck welt reenforcement in, since it was not on the original dress, (or cut out later when the dress was altered), and eventually common sense won out and I put them in.
As an after note, it was a good idea placing the neckline welts, the neckline shows no sign of bulging or stretching, which the original did. They lend tremendous stabilization to the neckline. I'm just sorry I only got one picture of them in place, (and not a very illustrative one at that).
I decided to take a picture of the pre sewn back flap with the measurements clearly drawn out on the square board, (See large picture below). You should have an 8" centered neck opening and then 7" on either side of the 22" dress body itself.
Underneath the 10 inch neck flap overlaps one inch on either side of the 8" mark.
The rest of the bodice flap is either ends at this 22" mark, or if you made the flap wider, (as I did), the flaps and welts expend out o the picture but are welted flush to the ends of the flap too, regardless of how wide they are.
note: This handy square board is sold at Joannes for $7.00 and worth it's weight in gold, they are 3'x72" and I can cut them to pieces, draw on them, throw it out and get another instead of buying an $80.00 quilters square board that isn't as big, harder to fold up and stash and will get ruined in no time anyway the way I run through projects!).
Now, whip stitch through all layers on first the front and then the back.
Stitch temporary lacing joining the front and back shoulder welts leaving about a half inch gap filled with your lacing, (you will redo the lacing afterwards, or just leave it as I did, it looked so good!).
Throw the dress on the form and take a look at a 500+ year old dress design come back to life!
Another Important Note:
The original dress had the deer tail sewn as an actual part of the front and back fold over flap, 5" wide and welt sewn onto the 22" wide front and back fold over flap at the edge of the 22" width. (see Photo above showing my notebook, you can see the tail is actually part of the fold over flap itself).
Since I decided to make my shoulder fold over flaps 28" wide the deer tail would have been over the shoulder and down the arm at a weird angle. I decided that for my dress I would make a deer tail and sew on later at a more favorable spot.
Subscribe to:
Posts (Atom)
LinkWithin
