 |
| Looking closely, you can see there is a strap of leather between races of dentalium shell and bead |
After much thought, agony and prayer, I have finally come to a conclusion about how I want to embellish the garment, it finally revealed itself to me through my "ideas" sketch book I use to jot things down when I have an inspirational moment.
 |
| Pic2 Dentalium attached to leather thongs, then assembled |
One theme seems to reoccur, the idea of a bird in flight. The yoke of the dress reminds me of, and I think it is no coincidence, that the arms outstretched mimic wings unfurled.
So there you have it, I will make it a Thunderbird in dentalium shells.
This presented me with a problem brought to my attention by my Dear Friend Eldonna, (who, with her Daughter, is adept at creating beautiful pre contact brain tan clothing), she reported that when her Daughter attached dentalium shells to a garment, there were problems with breakage.
This sent me back to the research files again, pulling up every picture I have of dentalium shells attached to leather clothing and I think I found the answer. Remember, dentalium was currency and also would optimistically be removable if one needed to spend ones "money" and also, if the garment ever failed, one would have to have a way of shifting the bead work from one garment to another.
 |
| Denatlium buffered with leather between races on earrings |
Looking carefully at photos of museum specimens I noticed a common trend, in almost all cases the shells are FIRST sewn to a leather thong top and bottom and then attached to the body of the dress or headpiece, or earrings, etc. This leather "buffer" would help the dentalium "float" above the fabric and act as a cushion, or shock absorber if you will.
This way of attaching the shells gives me the ability to remove the design intact if I ever need to and should be a sort of buffer to keep the shells floating above the brain tan, allowing greater freedom of movement without breakage.
There will, of course be some breakage if I do wear the dress intensively, but broken shells can be replaced as need by breaking the broken shell off with pliers and replacing the shell with another of similar size.
The thong also acts as a closure to the end of the shells, giving a smoother appearance, (the large end being covered instead of standing out from the fabric).
So now I have to figure out if I create the strips first and sew down after or create strips as I sew along.
 |
| Pic 1 Again, a leather thong buffer strip |
I imagine it will be the latter, or a combination of both.
I plan on using sinew throughout and have found a way to make my sinew thinner and finer for such work, but I also dread the idea of it, so many short threads!
But, that's the way it was, so that's the way it is, a new way to learn patience!
Below is a drawing I made a while ago when I started my projects, I discarded it at the time because I could not work out how I could represent the birds head in any realistic way, then, like a Stroke of Thunder, (ironically), the dress spoke and said, "You are the Thunderbirds Head".
This really excited me, as I wanted a dentalium head dress for this garment, suddenly I could see row upon row of dentalium shells covering my head as in pic 1 above, but then continuing in a cape over my shoulders like pic 2.
I get goosebumps just thinking about it.
I'd like to thank Eldonna, from the bottom of my heart for her telling me about the broken shell problem, without her advice, I never would have found the solution and the design of the dress. It just goes to show that no project is a solitary idea and that sharing your thoughts with others can only improve your design!
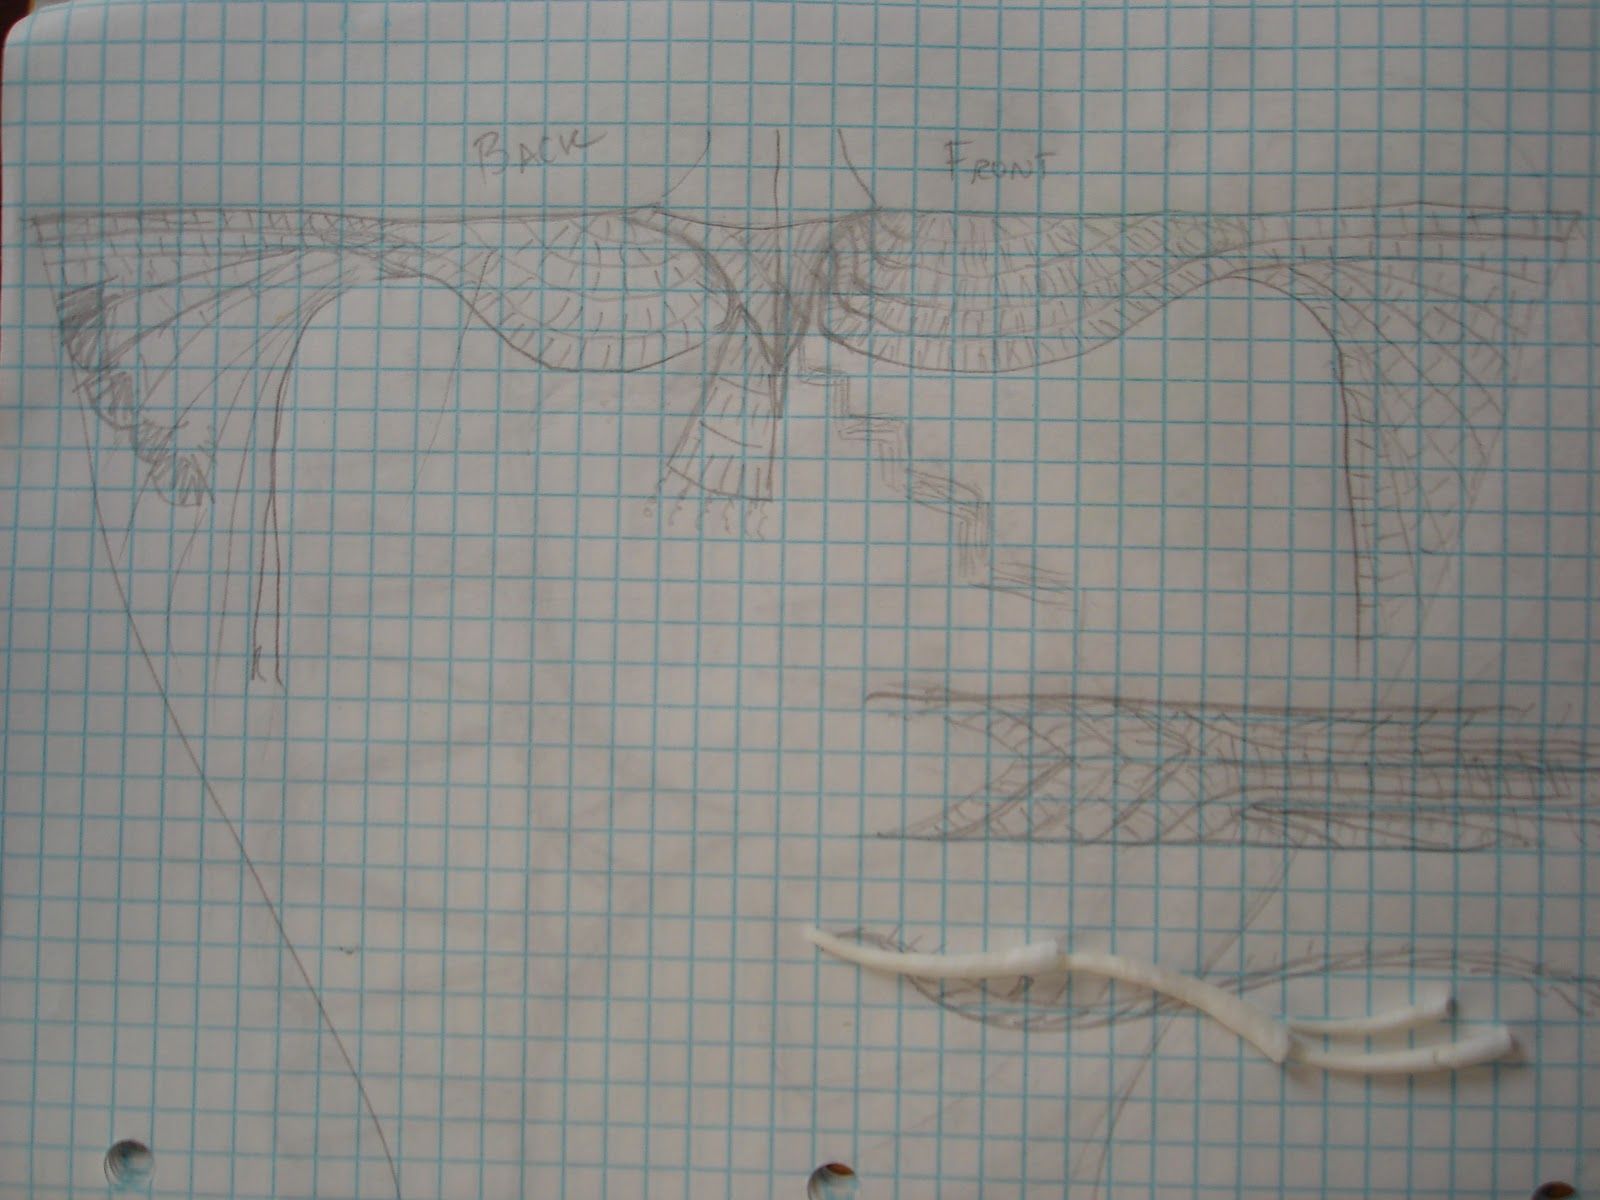 |
| Drawing of the Thunderbird pattern I made months ago, but forgot about until I went searching for ideas.... |
I'm n the process of making a dentalium cape. I need help in how to sew them on to a muslin cape. I have no idea how to do this. I read your article. Sounds like each shell was sewed on individually. Couldn't tell if that was back in the day or currently.
ReplyDeleteSee my post below, I forgot to reply directly to you. Sorry! Hope this helps!
DeleteFrom everything I can tell, not actually having a dentalium dress in my hands, but understanding the engineering of local people's methods of distributing long tubular beads was to sew a set of "tracks" in a running stitch below and above the line of dentatium, the thread is knotted on track one and then dentalium is threaded then secured to Track 2 on the top, then sewn thru the leather to the next dentallium placement on track 1, catching the thread, passing the the dentallium and then stitching into the thread track 2. I think all three tracks were drawn out, but stitched along at the same time to make correction adjustments, which are many when working with shell.
ReplyDeleteThe Wanderer, I've been meaning to thank you. I'm in the process of making the cape now. Now I need to learn how to make Dentalium Rounds.
ReplyDeleteForgot to add my email. pahavehae@gmail.com
ReplyDeleteForgot to add my email. pahavehae@gmail.com
ReplyDelete